Hi friends!
Today, May 19, 2020, is the eighth anniversary of our blog, I cannot believe it!
I hope all of you are doing well. Living in lockdown is something that we will not soon forget; we have had to adapt, and I believe, that we are doing a great job, considering the circumstances we find ourselves in at this unforgettable time.
I do not have a recipe for you today, rather, I have a writing update. Later this year, I will be publishing two books!
The first book is a novel entitled: ‘Imprisoned Hearts’, it is the second book in ‘The Hidden Hearts Series’.
Keynote:
When two teenagers agree to start a relationship, their problems and secrets threaten to ruin the new love they have found, can their love survive with the struggles they find?
If you have not read my first book, check it out, it is entitled: ‘Fevered Hearts’, it is a clean romantic suspense novel.
https://www.amazon.com/Fevered-Hearts-Book-Hidden-ebook/dp/B07JP94346
The second book is for children, it is entitled: ‘Nigel and The Festival of Flames’.
Keynote:
Nigel is competing in The Festival of Flames, but he is smaller than the other dragons and does not think he can throw his flames in the sky; will Nigel be victorious and win The Festival of Flames?
I cannot wait for you to read these books! I will post the links as soon as they are published.
I know Times are tough, but we can do this!
Stay safe! God bless!
Activities For Kids! March 23, 2020
Friends,
If you have children, I am sure you are going crazy during lockdown from the
Corona Virus, COVID-19.
Right now, you are super parents: working from home, trying to get your kids
to do their school work, and keeping your home running. When you are tired
of the video games and screen time, you probably think: “What am I going to
do to keep them entertained?”
Here are some fun activities that I have compiled, special thanks must go to
my friends who have shared their recipes with me or on social media. Due to
COVID-19 making shopping more challenging, I hope you are able to find, or
have the ingredients to make the following recipes.
*Kari’s Edible Play Dough
1 cup plain yogurt
1 cup ish of cornstarch
Food coloring
Mix the yogurt and food coloring together, then mix in the corn starch until
the play dough is as thick as you want. Play and eat to your hearts content.
Store in the refrigerator.
I followed a Facebook post where Kari asked for ideas to keep her kids
entertained, here are some great ideas someone posted in the comments:
1. Put shaving cream on your table and let them draw in it.
2. Dump baking soda on a baking sheet, get eye droppers to put colored
vinegar on it, and watch it bubble.
3. Put acrylic paint in a baggie, seal it, tape it down to your table, and
let them draw on it.
4. Get a big bowl and put water and dish soap in it and let them make
bubbles.
5. Color light Karo syrup with food coloring and then paint with it, it
looks like stained glass.
*Elizabeth’s Sidewalk Paint
Equal parts corn starch and water.
Then add food coloring.
Use paintbrushes and your imagination!
*Eileen’s Best Ever No-Cook Play Dough Recipe
2 cups plain flour (all purpose)
2 tablespoons vegetable oil (baby oil and coconut oil work too)
1/2 cup salt.
2 tablespoons cream of tartar.
1 to 1.5 cups boiling water (adding in increments until it feels just right)
gel food colouring (optional)
A few drops glycerin (my secret ingredient for stretch and shine!)
Mix everything together and play!
*Madelyn is a Special Education Teacher and she teaches visually impaired
and blind children, here are her ideas:
They could make edible necklaces, slime or kids love mini pizza.
Kids could also make cupcakes and take food coloring and decorate their own
couple of cupcakes stirring with a toothpick.
They can die Easter eggs using a bag:
Pour dry rice and put some food coloring in the bag. Then, roll the egg
around. They can make the eggs tactile using stickers as well.
*Faheem shared the following website which has wonderful activities for scout groups. https://www.scouts.org.uk/the-great-indoors/ *My ideas:
If you have pudding, eat and finger paint with it.
For chocolate pudding, try making cups of dirt (Quantities of each item are
up to you)
1. Fill your coffee mug/paper cup with chocolate pudding. Make chocolate pie
filling from the following link:
https://lewissisters.wordpress.com/2012/11/23/easy-chocolate-pie/ (Or use
the premade chocolate pudding cups for easier preparation).
2. Mix a few chunks of cookie in the pudding, optional.
3. Sprinkle cookie crumbs on top of the chocolate pudding so it is
completely covered.
4. Garnish with gummy worms. (watch out if you eat Gluten-Free)
5. Serve immediately or cover cups of dirt with Saran wrap and store in the
refrigerator until ready to eat. (You may want to hold off on adding the
cookie crumbs and gummy worms if the pudding is going to sit for a long time
or overnight).
Search for Wikki Stix (string covered in wax that you can mold) on Amazon;
kids can outline and color or paint around the Wikki Stix.
Play board games.
Draw on the sidewalk with ice cubes or sidewalk chalk.
Have dance parties and sing songs, play musical instruments.
Take a walk or hike. Jump rope, play hopscotch, or ride bicycles.
Cook and bake (There are plenty of recipes on the blog).
Build forts out of blankets or sheets.
Let the kids play in and color on boxes, as well as, make little towns for
their dolls, stuffed animals, or cars and other toys using boxes.
String beads onto pipe cleaners.
Write and perform plays. Write poetry. Read books. Write and illustrate stories. Aquariums and zoos are sharing videos each day to let us see their animals since they are closed to the public; a lot of museums are doing virtual tours as well.
Most of all, enjoy yourselves and stay safe!
Easy Way To Rehydrate Brown Sugar March 19, 2020
Hi everyone!
All I have to say about 2020 is, wow! None of us could have predicted the outbreak of COVID-19 (The Corona Virus). Wherever you are, we send you our love, and we pray that you are staying safe during this lockdown, which is so difficult, but necessary to stop the virus from spreading. Remember to wash your hands and check in with friends, family, and neighbors using technology.
Yesterday, our family endured three earthquakes; where we live, that is very unusual, luckily, there were no injuries. It took a two-hour workout, and baking banana muffins for me to relax. Here is the link to the muffin recipe.
https://lewissisters.wordpress.com/2018/09/05/banana-muffins/
When I had all of the ingredients ready to make the muffins, I discovered that my brown sugar was hard as a rock. Due to the already stressful situation, I was very irritated, and looked for a way to rehydrate the brown sugar quickly, which is what I want to share with you below.
1. Place your brown sugar in a microwave safe bowl.
2. Cover the bowl with a damp paper towel.
3. Microwave the brown sugar for 30 second intervals, until it is soft enough to break apart with a fork. be careful because the brown sugar will be hot; don’t heat the brown sugar too much, because it will melt.
4. When the brown sugar is soft, it is ready to be mixed into your batter!
I hope you are doing well!
God bless, stay safe!
From Banana Muffins To Banana Bread March 4, 2019
Hey guys!
I have a wonderful change to our banana muffins. Try making banana bread
with the same recipe; it works like a charm!
Yesterday afternoon, I wanted to make some banana muffins. I set to work
preparing the batter and added ¾ cup chocolate chips (just for fun)!
Remember, I love chocolate. 😊
When I was ready to put the batter in the muffin tins, I discovered I was
out of muffin liners. I did not have the patience to grease 24 muffin tins,
so I grabbed the next best thing…a loaf pan! After greasing it with
shortening, I poured the batter in and baked the bread for an hour or so,
until it was golden brown and my kitchen smelled fantastic!
Give this a try, you are going to love it!
Banana Muffins, or Banana Bread
Wisk together:
3 cups flour (gluten free)
1 cup white sugar
1 cup brown sugar
1 tsp salt
1 tsp baking soda
1 tsp cinnamon
Add and stir well with a spoon.
3 mashed bananas
4 eggs
2 tsps vanilla
1 and ¼ cups oil (applesauce)
¾ cup chocolate chips (optional)
Directions:
For banana bread, pour batter into a greased loaf pan. Bake at 375 degrees
for one hour, or until a toothpick inserted in the center comes out clean.
For muffins, pour batter into greased muffin tins or muffin liners. Bake at
375 degrees for 15 minutes or until done. Makes 2 dozen muffins.
I throw everything in my stand mixer and let it do all the work.
Enjoy!
‘Fevered Hearts’ is Available! October 30, 2018
Hey guys!
I don’t have a recipe for you, rather, I am thrilled to let you know that my debut novel ‘Fevered Hearts’ is live!
I can’t thank you enough for the support! You guys are incredible!
To brighten your day, pick up a copy of my clean, romantic, suspense novel and start reading!
I hope you enjoy!
Amazon link:
Archway Publishing Link:
https://www.archwaypublishing.com/Bookstore/BookSearchResults.aspx?Search=fevered%20hearts
Barnes and Noble Link:
https://m.barnesandnoble.com/w/fevered-hearts-macy-lewis/1129777819?ean=9781480868441
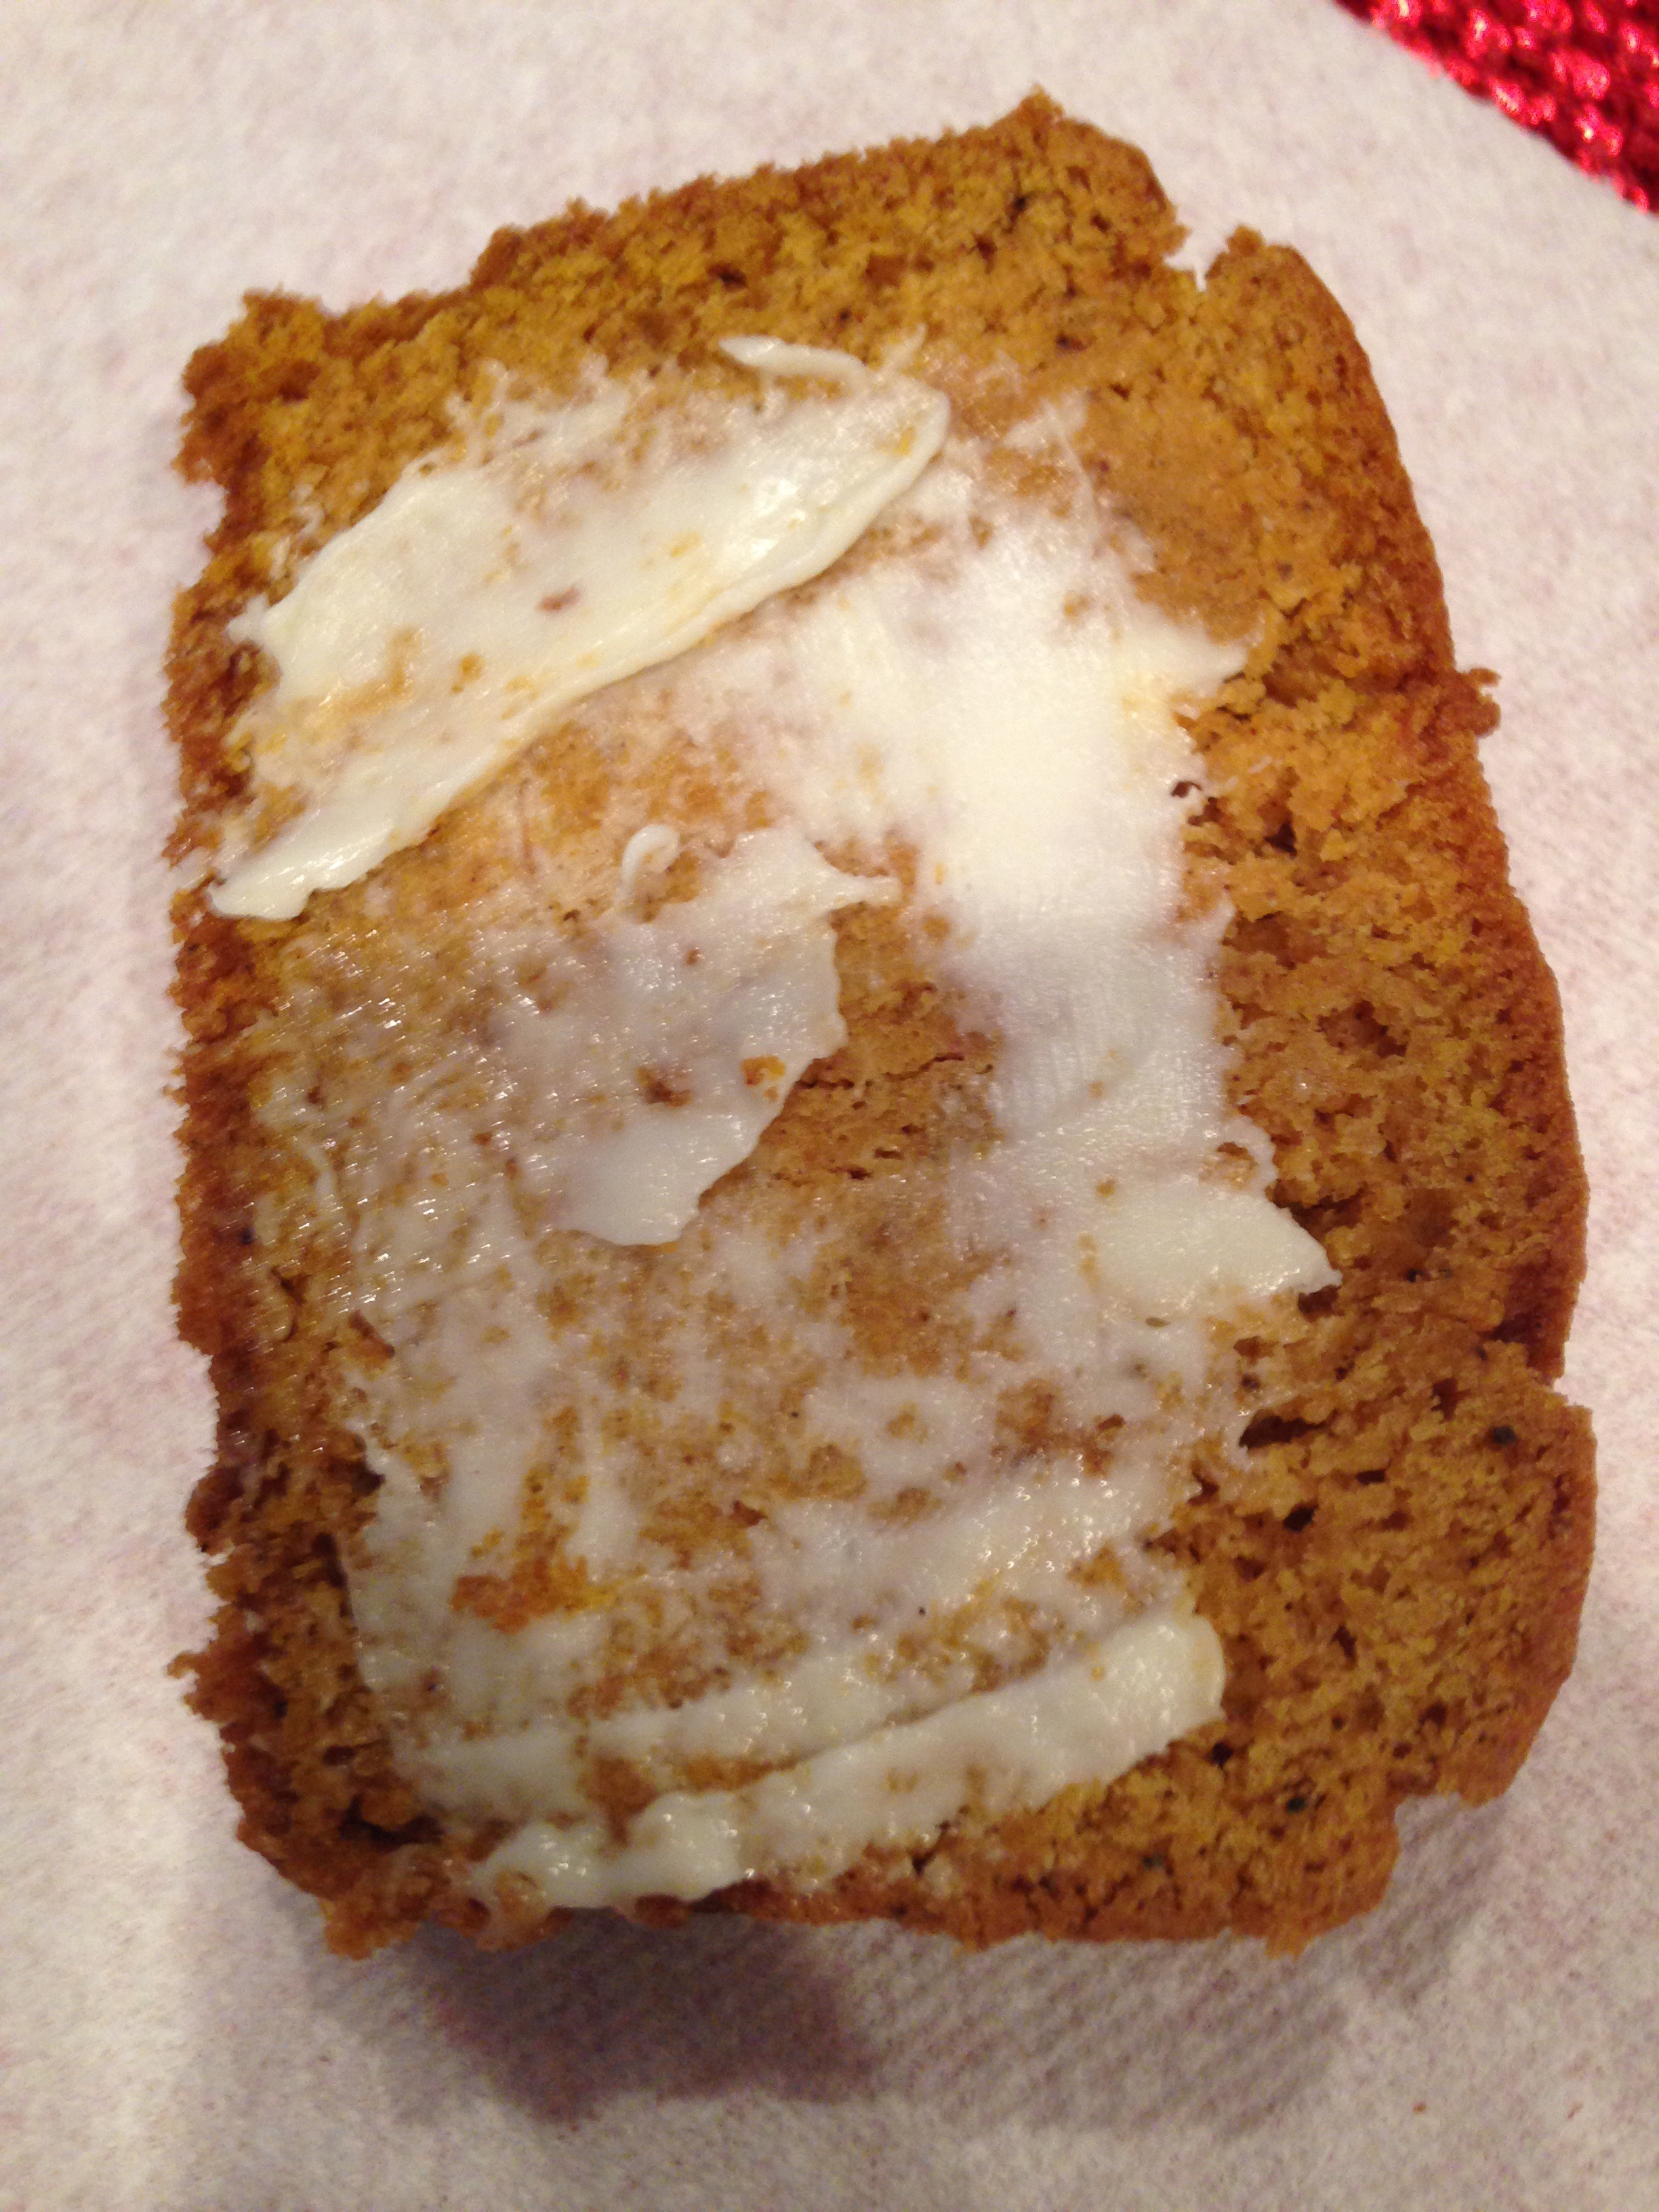
Pumpkin Bread December 26, 2016
Hi guys!
Here is a recipe we have been making for as long as I can remember at Christmas time. We have passed it out as neighbor and family gifts because it is so delicious!
This recipe says “Christmas!” to my family. We always have this bread for breakfast on Christmas morning, along with, Relief Society Potatoes https://lewissisters.wordpress.com/?s=funeral+potatoes ham and fruit. We love to top our bread with butter; this bread is wonderful gluten free or regular.
This recipe comes from the Betty Crocker Cookbook; I have no idea how many editions of that book exist, but when I searched online for the recipe a different one came up. So my guess is the recipe is only found in hard copy if you have the book; that is until now!
A word about the bread, if you make a double batch, it will take a very large bowl and if you have a smaller stand mixer, the batter won’t fit; however, a single batch of bread will fit just fine in your stand mixer. One more thing, if you use the disposable bread pans, you will get a lot of bread for your money, we use a combination of regular sized disposable bread pans and Minnie disposable bread pans when we make our bread.
I hope you try this recipe next fall, or Christmas, or make it right now before you make your New Year’s Resolutions. 🙂
Merry Christmas and Happy Holidays!
Pumpkin Bread
From the Betty Crocker COOKBOOK
2/3 cup shortening
2 and 2/3 cups sugar
1 (15 oz) small can pumpkin
2/3 cup water
4 eggs
3 and 1/3 cups flour (gluten free)
2 tsps baking soda
1 and 1 half tsps salt
1 half tsp baking powder
1 tsp ground cinnamon
1 tsp ground cloves
Directions:
1. Mix shortening and sugar in a large bowl. Add eggs, pumpkin, and water and mix until blended. If you use a stand mixer, use the paddle attachment.
2. In a separate bowl, mix the flour and spices together. Then, add dry mixture to the pumpkin mixture and mix together until mixture is blended. If you want, you can just add the dry ingredients on top of the wet and mix it in; it is much easier and saves a bowl from being washed.
3. Pour into greased disposable loaf pans big and small. Fill pans ½ or 2/3 full.
4. Bake at 350 for 1 hour and 10 minutes, or, until a toothpick inserted comes out clean.
5. Cool on cooling racks and store wrapped in saran wrap in the refrigerator. We love to top our bread with butter.
Enjoy!
Cranberry Bread December 4, 2016
Hi guys!
I had no plan to post a recipe this month; allowing all of us time to enjoy the holidays, but “‘tis the season for cranberries”! I found a festive quick bread in my recipes and simply had to share it with you all! This recipe comes from one of my mom’s ward cookbooks; it is a recipe for cranberry bread.
I like the fact that this recipe is one you can make entirely by hand, no need for your mixers. You know me, I also love quick breads! The verdict on this bread is an interesting one; the bread is great but I had a couple difficulties with it.
First, the bread was too moist so it did not come out of the pan all the way; some of the bread stuck to the pan. The picture looks funny, or as I like to call it, rustic and homemade.
Second, if you cannot find fresh/frozen cranberries at your grocery store, you may decide to use jelly, like me. However, I must caution you to not use the entire can like I did; this made the bread way to moist. I would suggest maybe half a cup or one cup at the most if using jelly. If you are using regular cranberries use the full amount. Once again, the bread is delicious; do not be afraid to try it.
Happy holidays from us to you!
Cranberry Bread

1 cup sifted flour (gluten free plus 1 Tbsp)
1 cup sugar
1 and 1/2 tsps baking powder
1 tsp salt
1/2 tsp baking soda
¼ cup butter, softened
1 egg
1 tsp grated orange peal
¾ cup orange juice (I bought orange juice in a bottle to be sure I had enough)
1 and 1/2 cups craisins
1 and 1/2 cups fresh or frozen cranberries chopped (I used cranberry jelly with whole berries in it because my grocery store did not have fresh or frozen cranberries)
Directions:
1. Sift flour, sugar, baking powder, salt, and baking soda into a large bowl. Using a pastry cutter, cut in butter until mixture is crumbly. (This can take three to five minutes by hand; it is very fun to do this way).
2. Add egg, orange peel and orange juice at once. Stir just until mixture is evenly moist.
3. Fold in cranberries and craisins that have been mixed with 1 Tbsp flour, this helps the fruit not to fall to the bottom of the loaf of bread. Spoon into a greased 9-5-3 inch loaf pan.
4. Bake at 350 for 1 hour and 10 minutes or until toothpick inserted in center comes out clean.
Enjoy!
Baking Cornbread with Macy November 18, 2016
Hi all,
I am so excited because this is our first video! It is a glimpse into my world and will show you how I bake, even though I am blind. The video can be seen at this link:
I need to thank my dad for filming the video and my brother-in-law for putting it together because my dad and I have no clue how to do video editing. Ha-ha
I hope you enjoy the video. I want you to know that I have no problem laughing at myself and the funny things that happen to me due to my blindness. You will see a part in the video where I can’t find something and I hope it makes you laugh. When my dad and I finished that shot we both laughed. I want you to know I love being blind and I do not see it as an obstacle in my life, but rather, it is a wonderful blessing. And no matter what happens I am so grateful for the challenges and triumphs I have because of it.
I hope we can do more videos in the future.
Love to you all!
Here is the link to the Cornbread recipe: https://lewissisters.wordpress.com/?s=cornbread
Zucchini Bread November 1, 2016
Hi guys!Remember the peach cobbler post from September? If you have not seen it, click on this link: https://lewissisters.wordpress.com/2016/09/05/peach-cobbler/
When we received the peaches that we used for the cobbler, Grandma Muse and my uncle gave us other vegetables and fruit from their garden. I made this wonderful bread in September and saved it to post this month. This recipe comes from Angie’s cookbook and we found it to be absolutely delightful!
Peel your zucchini before grating; also, be careful that you don’t grate your fingers, ouch! Grating zucchini is a great work out too. Ha-ha you will want to ring some of the extra liquid out of your shredded zucchini before adding it to your batter. To do this, I put the zucchini in a strainer lined with paper towels and wrung it out.
I made this recipe twice and learned, you can cut out ½ cup sugar and the bread still tastes fantastic.
Thanks for the recipe Angie, it is delicious!
Zucchini Bread


1 cup oil (applesauce)
2 cups sugar (1 and ½ cups works well too)
3 eggs
3 tsps vanilla
2 cups shredded zucchini (1 medium zucchini)
3 cups flour (gluten free)
1 tsp baking soda
1 tsp salt
3 tsps cinnamon
¼ tsp baking powder
½ cup chopped nuts (optional)
Directions:
1. Combine oil/applesauce, sugar, and eggs in a large bowl, beat well. Blend in vanilla and zucchini.
2. Sift dry ingredients together then add to wet mixture. Pour batter in to a greased and floured loaf pan.
3. Bake 350* for 1 hour. (If using smaller pan bake time 30 min).
4. Bread is done when a toothpick inserted comes out clean.
Enjoy!
Lemon Bread July 20, 2016
Hi Everyone!This month’s recipe is a delicious Lemon quick bread. This recipe comes from one of my mom’s ward cookbook; I wrote it down a few years ago and recently ran across it. I decided the bread had to be this month’s recipe, because I love lemon in the summer time and my parents said it sounded amazing when I told them about it. The bread is almost like a pound cake, very lemony and delicious!
To make this bread gluten free I used gluten free flour. I also used regular milk, rather than almond milk; because I thought the almond milk would taste weird with the lemon. The recipe says the bread should sit 24 hours before eating, so the glaze can soak in. But my parents and I were not about to let this quick bread sit for 24 hours. Ha-ha The glaze is very delicious if you let it sit for the allotted time.
Regarding the glaze… Be careful with how much lemon juice you use, I went a little overboard with the lemon juice and it was overpowering. When you squeeze the lemons watch out for seeds. And the glaze will soak all the way through the cake so it may not come out of the pan very well, even if you have greased it. I ran a knife around the edge of the bread and shook the pan as it sat up-side down on a plate. After several minutes of shaking the pan, the bread fell out.
I hope you give this easy delicious bread a try. It is fantastic when it is eaten warm and even better the next day.
Lemon Bread


1/3 cup melted butter
1 cup sugar
2 eggs
½ tsp almond extract
1 and 1/2 cups sifted flour (gluten free)
1 Tbsp grated lemon peel (one large lemon)
1 tsp baking powder
1 tsp salt
½ cup milk
Glaze:
3 Tbsps fresh lemon juice, a little more than one half slice of a large lemon
¼ cup powdered sugar
Directions:
1. Blend butter and sugar well, beat in eggs one at a time. Add almond extract.
2. Sift or mix dry ingredients together. Add dry ingredients to egg mixture alternately with the milk. Blend just until mixed.
3. Fold in lemon peel. Turn the batter into a greased loaf pan.
4. Bake at 325 degrees for 70 minutes, or until a toothpick comes out clean.
5. Glaze:
Mix fresh lemon juice and powdered sugar together; immediately spoon over baked hot loaf. (The glaze will soak all the way through the bread).
6. Cool for 10 minutes and remove from pan. Do not eat for 24 hours. (The bread is still wonderful if you eat it once it has slightly cooled)!
Enjoy!
